This website uses cookies
This website uses cookies. For further information on how we use cookies you can read our Privacy and Cookie notice
This website uses cookies. For further information on how we use cookies you can read our Privacy and Cookie notice
Shipped from abroad
Free return within 7 days for eligible items.Details
Yewulinjinanshangmaoyouxiangongsi
80%Seller Score
4 Followers
Shipping speed: Average
Quality Score: Excellent
Seller ts:
-- If there is any question, please feel free to contact us.
For example:Did not receive the order, the sticker got damaged, or cannot be d...
-- Sincere communication can soe all probl, but negative feedbawill not help.
-- Always cheyour size and color preferences before ing the order.
-- If you want to order multe stickers, please the shopping cart. Can help you save freight.
-- If you are a wholer, welcome to negotiate the price.
Die cut vinyl decals / car stickers made with premium Vinyl
-- Easy application. It is s-adhesive and does not fade or get up.
-- Sticks to any smooth surface: laptops, walls, cars, Windows,pers, guitar, ad, hone, refrigerator.
Size & Color
-- If you need a specific size just let us know.
-- Images can be red upon request. You can send a meage for inside pasting (re printing).
-- If you have a specific image you would like done, please feel free to send me a meage.
-- slightly from tured.
-- The color you choose will be the color of the actual vinyl sticker.
-- There will be no background, the background becomes whatever you stiit to.
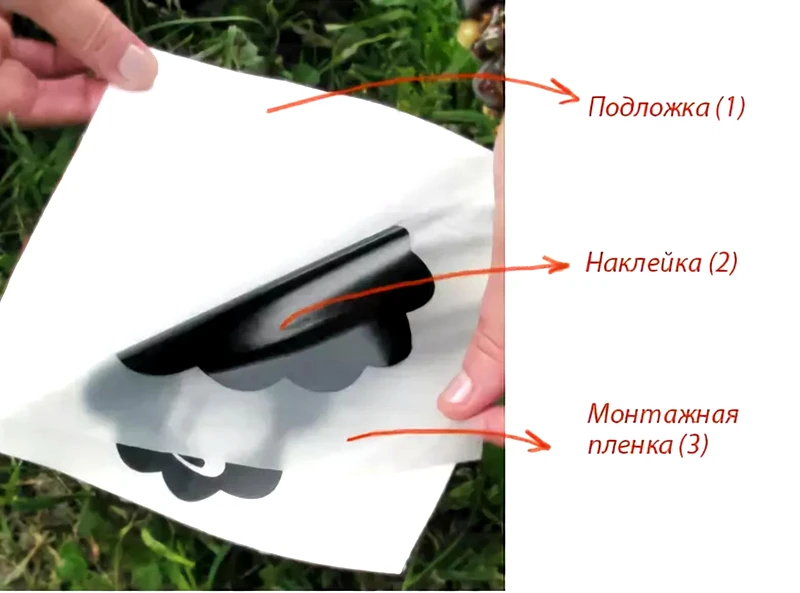
Vinyl sticker consists of three functional layers:
1. The top layer is a mounting film (nsparent nsfer tape), it has a weak adhesive layer facing the sticker and is designed to nsfer it to any smooth surface.
2. The middle layer is the vinyl sticker its.
3. The lowest layer is a siliconized paper/nsparent film backing that protects the adhesive layer of the sticker from contamination and damage.
Application Instructions:
----Step 1: Clean surface.
----Step 2: Prepare the decal.
With the design facing down, slowly peel off backing. IF the decal sticks to the surface of the backing, stop and roll it baa little and try again.
----Step 3: Apply the decal.
Carefully p your design onto the desired location with the sticky side of the nsfer tape and the design facing your destination. You can gently rub out any imperfections or bubbles using a credit card. (The more you get the design to stick, the easier it will be to remove the nsfer tape).
----Step 4: Remove your nsfer tape.
Very slowly, remove the nsfer tape from the surface. DO NOT RUSH. As you remove the backing, the decal should stito the surface.


This product has no ratings yet.
/product/30/9166491/1.jpg?4402)
Subscribe to our newsletter
and be the first one to know about our amazing deals!